Tuesday, 12 July 2011

Photography 1: TAOP, Ex Shiny Surfaces

Project: Photographic Lighting.
Exercise: Shiny Surfaces.

Objects with surfaces that reflect brightly, such as chrome or silver, are a special lighting problem.

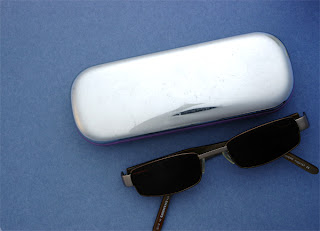
For this exercise I used a shiny glasses case.  It was so shiny that you could see your face in it.  The object was placed on a flat surface so that it could be photographed from above.  A light was set up close to the camera.  A photograph was taken with this set up for reference.


5587.jpg; Reference image.

A large sheet of tracing paper was rolled into the shape of a long cone so that the wide end would sit around the object, (but out of view), and so that it tapers upwards to the small end, which fitted just around the lens.  The length of the cone was exactly the distance from the camera to the subject.  A second photograph was taken.

5589.jpg; With cone diffuser.

I then experimented with the light in different positions and at different distances.  I also tried changing the angle of the object slightly.  A photograph was taken of each setup.

5590.jpg; Light behind camera.

5591.jpg; Light to side, 1.5m away.

5592.jpg; Object turned slightly.

What have I learned from this exercise?

In order to photograph shiny objects successfully, set the proper environment.  Using a light tent where the light is very well distributed is key, (as created with the tracing paper in this exercise). If you do not have a light tent, create this environment by diffusing your light sources.

Set up the lights in a manner that will not reflect anything on the object. Take some sample pictures and see how they look. If they are not right, move the lights. Some positioning options are: above the object or in front of the object on either side.

Only let the light tent open enough to let the lens of your camera through. This will keep the camera reflection out of your photo. Do not use a lens hood. Being above the object and shooting in a downward angle is a good option, when possible. Shoot the object with as much opaque portions as possible facing the lens of your camera.

Monday, 11 July 2011

Photography 1: TAOP, Ex Contrasts and Shadow Fill

Project: Photographic Lighting
Exercise: Contrast and Shadow Fill

For this exercise I set up a simple still-life.  Room was left for access at the sides of the set.  The scene was shot from the same level as the objects.  A light was fixed about 2-3 feet to one side of the objects and at their level, so that it was aimed at right angles to the camera's view.

The first photograph was taken without a diffuser in front of the lamp and the second with a diffuser.  These were followed with a series of 5 exposures using the diffused light.  The light and camera remained unchanged.  The first two photographs are shown below:

5580.jpg; F11; 1/125s; No Diffuser.

5581.jpg; F11; 1/90s; With Diffuser.
The lighting of the objects is more even when the diffuser is used.  The diffused light is able to "leak" around the edges of the objects.

For the next image a white card was positioned about 3 feet away from the objects on the opposite side to the light and facing it.

5582.jpg; F11; 1/60s; White Card Reflector 3 feet away.

The next image was taken as above but with the white card positioned about 1 foot away from the objects.

5583.jpg; F11; 1/60s; White Card Reflector 1 foot away.

In the second of the two images above the side of the objects furthest away from the light is brighter than in the first.

The white card was then covered with aluminium foil, with the dull side facing the objects.  A photograph was taken.  The foil was then turned round to the shiny side and another photograph taken.

5584.jpg; F11; 1/90s; Dull Foil Reflector 2 feet away.

5585.jpg; F11; 1/125s; Shiny Foil Reflector 2 feet away.

The shiny foil reflected more of the light from the lamp onto the side of the objects furthest away.  More of the shadows were filled with light.

For the last shot the foil was crumpled, straightened out and re-attached to the card, shiny side out.

5586.jpg; F11; 1/180s; Crumpled and Shiny Foil Reflector 2 feet away.

I then compared each of the images and placed them in order of contrast, from greatest to least:

5580; 5581; 5582; 5583; 5586; 5584; 5585.

What have I learned from this exercise?

Using quite simple and easy to produce reflectors, the contrast in an image can be altered significantly.

Friday, 1 July 2011

Photography 1: TAOP, Ex Tungsten & Fluorescent Lighting

Project: Available light.
Exercise: Tungsten & fluorescent lighting.

Part 1.
For the first part of this exercise I found a room that was fairly brightly lit by tungsten lamps.  I turned off any fluorescent lamps.  Just after sunset, when there was only a little daylight left that was weaker than the room lights, I stood close to the window and looked out for about a minute, until my eyes became adjusted.  I then turned around and looked at the room light.  The room light seemed yellow.  After my eyes adjusted for a couple of minutes, it seemed less coloured.  I then quickly looked out of the window again.  The daylight outside seemed blue.

I next measured the light level at various points in the room with my camera's meter.  I took several readings including close to a reading lamp, and in the darkest corner.  I set the aperture to the largest available, F4.5 and recorded the shutter speed:

1/10s; 1/15s; 1/20s; 1/8s (darkest part of room); 1/10s; 1/10s; 1/30s (near reading lamp).

None of these readings would be good enough for hand-held shooting.

I next composed a photo in which both the interior lit by tungsten lamps and the exterior at dusk were both visible.  I waited until the light levels inside and outside were approximately equal, and took 3 photos, as follows: with the white balance set to Auto, with the white balance set to daylight and with the white balance set to tungsten.  The three photos are shown below:

5569.jpg; F11; 1.5s; Auto WB
5570.jpg; F11; 1.5s; Daylight WB
5571.jpg; F11; 1.5s; Tungsten WB
With the white balance set to Auto, the camera has made a reasonable compromise with the colour balance with neither the interior or exterior completely correct.  With the WB set to Daylight, the colour of the daylight is good but the interior light is too yellow.  With the WB set to Tungsten, the interior light is good but the daylight is too blue.

Part 2.

For part 2, I found two different interiors and lit them by compact fluorescent lamps.  I took four photos of each location each identically composed.  The first image was taken with the WB set to Auto, the second set to Daylight Fluorescent, the third set to Neutral Fluorescent and the fourth set to White Fluorescent.  The photographs produced are shown below:

5572.jpg; F11; 1/2s; Auto WB
5573.jpg; F11; 1/2s; Daylight Fluorescent WB
5574.jpg; F11; 1/2s; Neutral Fluorescent WB
5575.jpg; F11; 1/2s; White Fluorescent WB


5576.jpg; F11; 1/3s; Auto WB
5577.jpg; F11; 1/30s; Daylight Fluorescent WB
5578.jpg; F11; 1/30s; Neutral Fluorescent WB
5579.jpg; F11; 1/30s; White Fluorescent WB
In each location, the White Fluorescent WB setting gave the best colour rendition.  This uses a colour temperature of 4200K, the closest to that of the CFLs used  which are calibrated to 2700K, (the colour temperature of a tungsten incandescent lamp).

What have I learned from this exercise?

Tungsten lighting is much weaker than daylight and in most rooms it is very uneven.

Many commercially available fluorescent tubes include a continuous spectrum as well as the bands of light produced by the fluorescent coating to give a more pleasant light.  This means that they can be given an equivalent colour temperature although they can still produce a green colour cast without adjustment to the white balance on digital cameras.

Tuesday, 21 June 2011

Photography 1: The Art of Photography

Project: Photographic lighting.
Exercise: Softening the light.

For this exercise I set up a still life arrangement and fixed the light source more or less overhead, pointing down.  The first image was created using a naked lamp.  For the second image the light from the lamp was diffused.

The images are shown below:

5513.jpg; Naked lamp; F16; 1/125s

5514.jpg; Diffused lamp; F16; 1/90s

What have I learned from this exercise?

The naked lamp has produced the better image.  The surface texture is more pronounced.  The diffused lamp produces a more even lighting but the detail of the object is less defined.

Photography 1: The Art of Photography

Project: Photographic lighting.
Exercise: The lighting angle.

For this exercise I used a diffused light source.  I experimented with using it from different directions.  For parts 1 and 2, the camera was kept in a fixed position, (on a tripod) aimed horizontally at the subject.  For part 3, the photographs were taken from overhead.  I moved the light around the object and took a photograph at each position.

1.  Light at the same level as the subject and camera.

5517.jpg; Front lighting; F16; 1/90s
5518.jpg; Side lighting; F16; 1/90s
5519.jpg; Behind and to one side lighting; F16; 1/90s
5520.jpg; Directly behind lighting; F16; 1/90s

2.  Light raised so that it points down at an angle of 45 degrees.

5525.jpg; Front lighting; F16; 1/60s
5524.jpg; Side lighting; F16; 1/45s
5523.jpg; Behind and to one side lighting; F16; 1/45s
5522.jpg; Directly behind lighting; F16; 1/90s

3.  Light suspended overhead, pointing down.  Photograph taken directly overhead.

5526.jpg; Directly overhead lighting; F16; 1/60s
5527.jpg; Overhead and slightly in front lighting; F16; 1/90s
5528.jpg; Overhead and slightly behind lighting; F16; 1/60s

What did I learn from this exercise?

When studying the differences between the images due to moving the light I found that certain qualities of the subject are revealed better by some lighting conditions.  The position directly behind shows the shape fairly well.  The "slightly behind" positions will highlight the edges.

Image 5524, produced with the light raised so that it points down at an angle of 45 degrees gives the best 3-dimensional effect, ie reveals the form of the subject best.

Photography 1: The Art of Photography

Project: The time of day
Exercise: Variety with a low sun.

The object of this exercise is to demonstrate some of the advantages of shooting when the sun is low.  The photos were taken when the sun was low, within about 2 hours of sunset.  I took images of a sculpture using frontal lighting, side lighting, back lighting and edge lighting.

The images are shown below:

5537.jpg; Frontal Lighting; F13; 1/500s
5542.jpg; Side Lighting; F13; 1/125s
5547.jpg; Back Lighting; F13; 1/125s
5550.jpg; Edge Lighting; F13; 1/60s

What have I learned from this exercise?

Frontal lighting will produce an intense but somewhat flat image.  Side lighting will give more information about the shape of the item.  The contours and texture of the object are more defined.  Back lighting creates a large amount of shadow.  The lighting results in a partial silhouette, the intensity of the shadow will depend on the location of the sun.  Edge lighting is a special condition for shooting towards the sun.  Only the edge of the object is lit.  The effect is best when the object is placed against a dark background.

Photography 1: The Art of Photography

Project: The time of day
Exercise: Light through the day.

For this exercise I photographed one scene from dawn to dusk.  I took one picture per hour throughout the day and one per half-hour at the end of the day, when the light was changing faster.

I used a tripod and cable release.

The images are shown below:

5560.jpg; 7:00am; F16; 1/6s
5561.jpg; 8:00am; F16; 1/10s
5510.jpg; 9:00am; F16; 1/10s
5511.jpg; 10:00am; F16; 1/8s
5531.jpg; 11:00am; F16; 1/10s
5532.jpg; 1:00pm; F16; 1/30s
5533.jpg; 2:00pm; F16; 1/30s
5512.jpg; 3:00pm; F16; 1/10s
5534.jpg; 4:00pm; F16; 1/15s
5535.jpg; 5:00pm; F16; 1/10s
5529.jpg; 6:00pm; F16; 1/45s
5553.jpg; 7:00pm; F16; 1/10s
5554.jpg; 7:30pm; F16; 1/4s
5555.jpg; 8:00pm; F16; 1/3s
5556.jpg; 8:30pm; F16; 1s
My favourite image is image 5560, taken at 7:00am.  The light at this time of day has produced sharp definition in the image combined with a warm tone.  I expected this light would be best due to the low slanting light.

What have I learned from this exercise?

The use of side lighting, such as that available at the beginning and end of the day due to its capacity to emphasise contours, textures and forms is the best form of lighting.  The obliqueness of light also creates a stronger contrast between the paler and darker surfaces in a subject and so brings out much greater definition of form.