Exercise: Shiny Surfaces.
Objects with surfaces that reflect brightly, such as chrome or silver, are a special lighting problem.
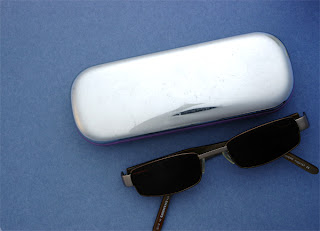
For this exercise I used a shiny glasses case. It was so shiny that you could see your face in it. The object was placed on a flat surface so that it could be photographed from above. A light was set up close to the camera. A photograph was taken with this set up for reference.
 |
| 5587.jpg; Reference image. |
A large sheet of tracing paper was rolled into the shape of a long cone so that the wide end would sit around the object, (but out of view), and so that it tapers upwards to the small end, which fitted just around the lens. The length of the cone was exactly the distance from the camera to the subject. A second photograph was taken.
 |
| 5589.jpg; With cone diffuser. |
I then experimented with the light in different positions and at different distances. I also tried changing the angle of the object slightly. A photograph was taken of each setup.
 |
| 5590.jpg; Light behind camera. |
 |
| 5591.jpg; Light to side, 1.5m away. |
 |
| 5592.jpg; Object turned slightly. |
What have I learned from this exercise?
In order to photograph shiny objects successfully, set the proper environment. Using a light tent where the light is very well distributed is key, (as created with the tracing paper in this exercise). If you do not have a light tent, create this environment by diffusing your light sources.
Set up the lights in a manner that will not reflect anything on the object. Take some sample pictures and see how they look. If they are not right, move the lights. Some positioning options are: above the object or in front of the object on either side.
Only let the light tent open enough to let the lens of your camera through. This will keep the camera reflection out of your photo. Do not use a lens hood. Being above the object and shooting in a downward angle is a good option, when possible. Shoot the object with as much opaque portions as possible facing the lens of your camera.
No comments:
Post a Comment