Friday, 19 November 2010

Photography 1: The Art of Photography

Project: Cropping and Extending
Exercise: Cropping

For this exercise I took 3 photographs from a previous exercise and experimented with different ways of cropping the images.

What have I learned from this exercise ?

By experimenting with different cropping options for a photograph it is sometimes possible to find a more interesting image or one that has more impact within the photograph.

The original photographs along with their final crops are shown below:

4794
4794-B
I cropped the original photograph of this person waiting for a tram in Will Brandt Platz in Frankfurt so as to isolate him from the background.  The subject is typical of the bankers of Frankfurt, checking his email while he waits.

4766
4766-A
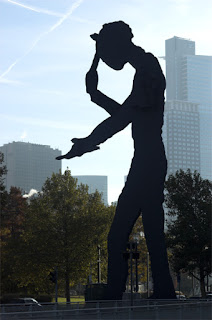
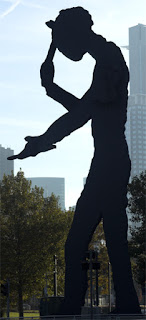
I cropped this image of the animated statue in front of the Messe in Frankfurt so as to concentrate on its silhouette.  With less of the background detail the statue is more clearly defined.

4801
4801-A
I cropped this image so as to more closely fit the frame to the subject.  The subject seems to fit the squarer frame shape better.

Photography 1: The Art of Photography

Project: Frame Shapes and Sizes.
Exercise: Vertical and Horizontal Frames.

I took the photographs for this exercise on a recent trip to the German city of Frankfurt.  I chose 20 separate locations and took a photograph of each of the locations in both vertical and horizontal format.

What did I learn from the exercise?

It is clear that most scenes can be made to work as both a vertical and a horizontal image.  The result may not always suit the subject and may not be quite as successful.  However, it is important not to get into the habit as seeing all images as either vertical or horizontal.

The pairs of images are shown below:

4758
4759

4762
4763

4764
4765

4766
4767
4773
4774

4777
4778


4850
4851


4798
4801

4792
4793

4794
4795

4796
4797

4802
4804

4805
4806

4807
4808

4812
4813

4816
4818

4824
4825

4826
4827

4838
4839

4847

4846

Friday, 5 November 2010

Photography 1: The Art of Photography

Project: Dividing The Frame.
Exercise: Positioning the horizon.


For this exercise I found a viewpoint outdoors that gave a reasonably interesting landscape in which there was an unbroken and clear horizon.


I then took a short sequence of 6 photographs in which the horizon was placed at different positions in the frame from the top to the bottom.


7239
 In this photograph the horizon is placed at the top of the frame.  I like this image because it has foreground detail and detail in the middle distance.  The viewer's eye is encouraged to move between the foreground and background of the photograph.

7238
Here the horizon has been placed in the centre of the frame.  This has created quite a static composition.  There is little foreground detail to help with the composition.

7237
In this photograph the horizon has been placed just below the centre of the frame.  This has given greater prominence to the interesting sky.  The cloud formation gives 3 distinct areas of the frame.  This makes a more interesting composition.

7236
Here the horizon is placed approximately one third the frame height from the bottom of the frame.  I find this photograph the most interesting because with the help of the cloud formation, the frame is divided roughly into thirds.

7235
The horizon in this photograph is placed towards the bottom of the frame.  The composition is quite dynamic.  With the sky prominent, it gives the photograph a greater feeling of depth.

7234
Here the horizon is placed at the bottom of the frame.  The sky is very prominent.  As there is little detail below the horizon the resulting composition is not very pleasing.

What have I learned from this exercise ?

A centrally placed division of the frame creates a very static composition.  A higher or lower division will be more dynamic and give the picture a greater feeling of depth.  Adding foreground detail makes the static effect of a centrally placed division less important.